
前回は、AlertDialogを表示する事を実施しました。
今回はAlertDialogのデザインを変更したいと思います。
デフォルトのダイアログでは色味がアプリと合わない等あると思います。
そういう場合はデザインを変更しましょう!
ダイアログ内のボタンの色を変更する
デフォルトではボタンの色はres/colors.xmlに記載してあるcolorAccentの色が適応されます。
「OK」ボタンや「キャンセル」ボタン等個々のボタンの色を変更したい場合下記を記述します。
// AlertDialogのインスタンスを生成する
AlertDialog alertDialog = new AlertDialog.Builder(this)
        .setTitle("タイトル")
        .setMessage("メッセージ")
        .setPositiveButton("OK", (dialog, which) -> {
            // OKボタン押下時に実行したい処理を記述
        })
        .setNegativeButton("キャンセル", (dialog, which) -> {
            // キャンセルボタン押下時に実行したい処理を記述
        })
        .setNeutralButton("また後で", (dialog, which) -> {
            // また後で押下時に実行したい処理を記述
        })
        .create();
// ダイアログを表示する
alertDialog.show();
// OKボタンのインスタンスを取得する
Button positiveButton = alertDialog.getButton(DialogInterface.BUTTON_POSITIVE);
// OKボタンの色を変更する
positiveButton.setTextColor(Color.BLUE);
// キャンセルボタンのインスタンスを取得する
Button negativeButton = alertDialog.getButton(DialogInterface.BUTTON_NEGATIVE);
// キャンセルボタンの色を変更する
negativeButton.setTextColor(Color.RED);
// また後でボタンのインスタンスを取得する
Button neutralButton = alertDialog.getButton(DialogInterface.BUTTON_NEUTRAL);
// また後でボタンの色を変更する
neutralButton.setTextColor(Color.GREEN);
// AlertDialogのインスタンスを生成する
val alertDialog = AlertDialog.Builder(this)
.setTitle("タイトル")
.setMessage("メッセージ")
.setPositiveButton("OK") { dialog, which ->
// OKボタン押下時に実行したい処理を記述
}
.setNegativeButton("キャンセル") { dialog, which ->
// キャンセルボタン押下時に実行したい処理を記述
}
.setNeutralButton("また後で") { dialog, which ->
// また後でボタン押下時に実行したい処理を記述
}
.create()
// ダイアログを表示する
alertDialog.show()
// OKボタンのインスタンスを取得する
val positiveButton = alertDialog.getButton(DialogInterface.BUTTON_POSITIVE)
// OKボタンの色を変更する
positiveButton.setTextColor(Color.BLUE)
// キャンセルボタンのインスタンスを取得する
val negativeButton = alertDialog.getButton(DialogInterface.BUTTON_NEGATIVE)
// キャンセルボタンの色を変更する
negativeButton.setTextColor(Color.RED)
// また後でボタンのインスタンスを取得する
val neutralButton = alertDialog.getButton(DialogInterface.BUTTON_NEUTRAL)
// また後でボタンの色を変更する
neutralButton.setTextColor(Color.GREEN)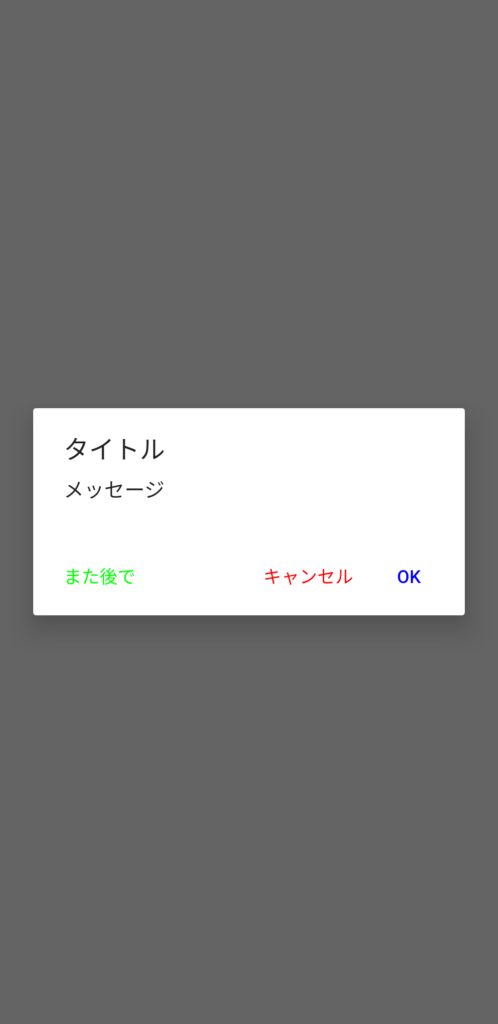
getButton()の説明
| 引数型 | 説明 | |
| 第一引数 | Int | 取得したいボタンの下記定数を引数にするとボタンのインスタンスを取得できる OKボタン: DialogInterface.BUTTON_POSITIVE キャンセルボタン: DialogInterface.BUTTON_NEGATIVE また後でボタン: DialogInterface.BUTTON_NEUTRAL |
ダイアログ内のボタンの大きさを変更する
続いてはダイアログ内のボタンの大きさを変更してみましょう
// AlertDialogのインスタンスを生成する
AlertDialog alertDialog = new AlertDialog.Builder(this)
        .setTitle("タイトル")
        .setMessage("メッセージ")
        .setPositiveButton("OK", (dialog, which) -> {
            // OKボタン押下時に実行したい処理を記述
        })
        .setNegativeButton("キャンセル", (dialog, which) -> {
            // キャンセルボタン押下時に実行したい処理を記述
        })
        .setNeutralButton("また後で", (dialog, which) -> {
            // また後で押下時に実行したい処理を記述
        })
        .create();
// ダイアログを表示する
alertDialog.show();
// OKボタンのインスタンスを取得する
Button positiveButton = alertDialog.getButton(DialogInterface.BUTTON_POSITIVE);
// OKボタンのテキストサイズを変更する
positiveButton.setTextSize(24);
// キャンセルボタンのインスタンスを取得する
Button negativeButton = alertDialog.getButton(DialogInterface.BUTTON_NEGATIVE);
// キャンセルボタンのテキストサイズを変更する
negativeButton.setTextSize(12);
// また後でボタンのインスタンスを取得する
Button neutralButton = alertDialog.getButton(DialogInterface.BUTTON_NEUTRAL);
// また後でボタンのテキストサイズを変更する
neutralButton.setTextSize(32);
// AlertDialogのインスタンスを生成する
val alertDialog = AlertDialog.Builder(this)
.setTitle("タイトル")
.setMessage("メッセージ")
.setPositiveButton("OK") { dialog, which ->
// OKボタン押下時に実行したい処理を記述
}
.setNegativeButton("キャンセル") { dialog, which ->
// キャンセルボタン押下時に実行したい処理を記述
}
.setNeutralButton("また後で") { dialog, which ->
// また後でボタン押下時に実行したい処理を記述
}
.create()
// ダイアログを表示する
alertDialog.show()
// OKボタンのインスタンスを取得する
val positiveButton = alertDialog.getButton(DialogInterface.BUTTON_POSITIVE)
// OKボタンのテキストサイズを変更する
positiveButton.textSize = 24f
// キャンセルボタンのインスタンスを取得する
val negativeButton = alertDialog.getButton(DialogInterface.BUTTON_NEGATIVE)
// キャンセルボタンのテキストサイズを変更する
negativeButton.textSize = 12f
// また後でボタンのインスタンスを取得する
val neutralButton = alertDialog.getButton(DialogInterface.BUTTON_NEUTRAL)
// また後でボタンのテキストサイズを変更する
neutralButton.textSize = 32f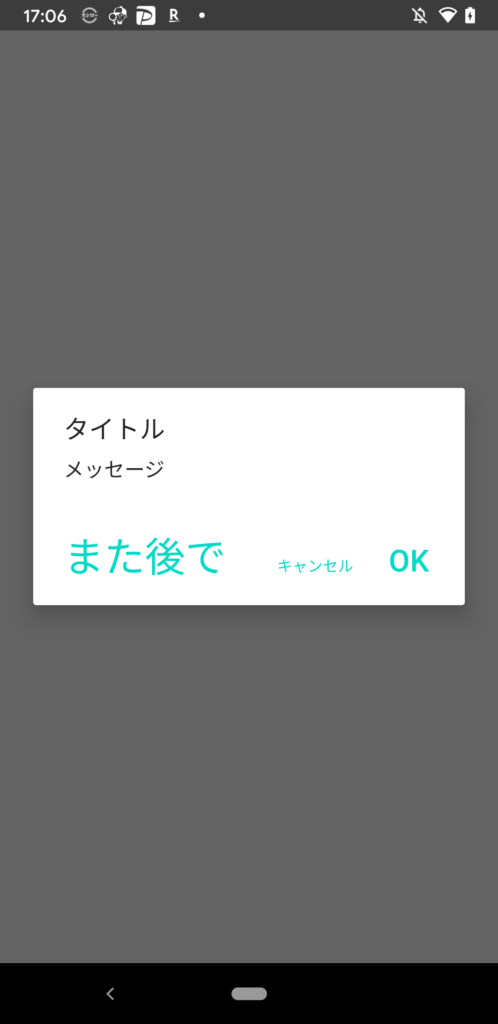
setTextSize()の説明
| 引数型 | 説明 | |
| 第一引数 | Float | Float値が大きくなればなるほどテキストサイズが大きくなる |
ダイアログのタイトルのデザインを変更する
ではタイトルのデザインを変更してみましょう!
タイトルのデザインを変更するとさらにオリジナルのAlertDialogになりますね!
前提準備
まずはタイトルに表示したいレイアウトXMLを作成しましょう
<?xml version="1.0" encoding="utf-8"?>
<androidx.constraintlayout.widget.ConstraintLayout
    xmlns:android="http://schemas.android.com/apk/res/android"
    xmlns:app="http://schemas.android.com/apk/res-auto"
    android:layout_width="match_parent"
    android:layout_height="wrap_content"
    android:background="@color/colorAccent">

    <TextView
        android:layout_width="wrap_content"
        android:layout_height="wrap_content"
        android:padding="8dp"
        android:text="タイトル"
        android:textColor="#FFF"
        android:textSize="24dp"
        app:layout_constraintTop_toTopOf="parent"
        app:layout_constraintBottom_toBottomOf="parent"
        app:layout_constraintStart_toStartOf="parent" />

</androidx.constraintlayout.widget.ConstraintLayout>
実装
// 作成したカスタムタイトルのインスタンスを生成
View customTitle = getLayoutInflater().inflate(R.layout.custom_title, null, false);
// ダイアログを表示する
new AlertDialog.Builder(this)
    .setCustomTitle(customTitle)
    .setMessage("メッセージ")
    .setPositiveButton("OK", (dialog, which) -> {
        // OKボタン押下時に実行したい処理を記述
    })
    .setNegativeButton("キャンセル", (dialog, which) -> {
        // キャンセルボタン押下時に実行したい処理を記述
    })
    .setNeutralButton("また後で", (dialog, which) -> {
        // また後で押下時に実行したい処理を記述
    })
    .create()
    .show();
// 作成したカスタムタイトルのインスタンスを生成
val customTitle: View = layoutInflater.inflate(R.layout.custom_title, null, false)
// ダイアログを表示する
AlertDialog.Builder(this)
.setCustomTitle(customTitle)
.setMessage("メッセージ")
.setPositiveButton("OK") { dialog, which ->
// OKボタン押下時に実行したい処理を記述
}
.setNegativeButton("キャンセル") { dialog, which ->
// キャンセルボタン押下時に実行したい処理を記述
}
.setNeutralButton("また後で") { dialog, which ->
// また後で押下時に実行したい処理を記述
}
.create()
.show()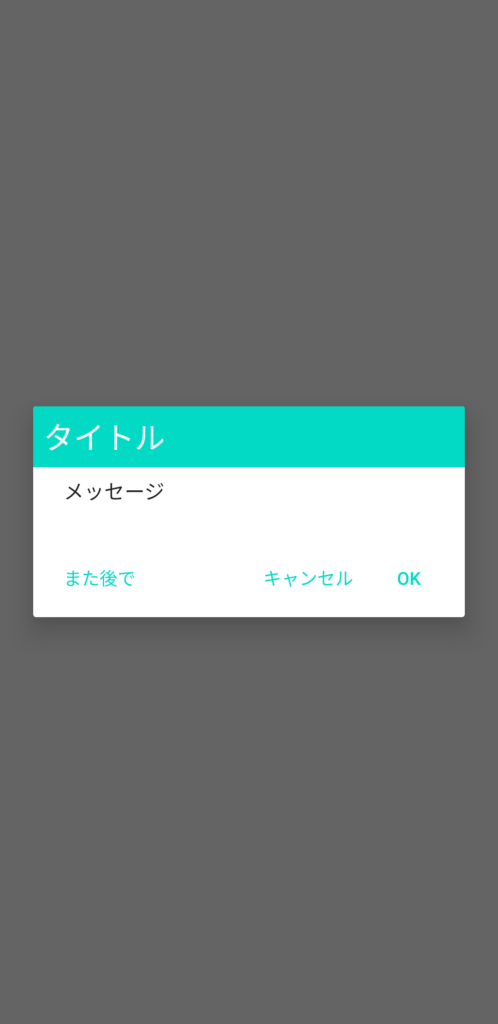
setCustomTitle()の説明
| 引数型 | 説明 | |
| 第一引数 | View | AlertDialogタイトル表示部分に引数のViewが表示される |
Viewがタイトル部分に表示できるので様々なレイアウトでタイトルが表示できます
最後に
いかがでしたでしょうか
AlertDialogのデザインを変更する事によりアプリデザインに寄せたダイアログが表示できるのではないでしょうか
それではまた次回!

コメント