
こんにちは!
前回はカスタムビューを作成しました。
今回はそのカスタムビューにカスタム属性を作成して追加してみましょう!
カスタム属性とは?
TextViewを例にすると
    <TextView
        android:id="@+id/textView"
        android:layout_width="wrap_content"
        android:layout_height="wrap_content"
        android:text="テキスト" />
Androidフレームワークがandroid:text=等のattributeを用意してくれているのですが、
自作したViewにはオリジナルのattributeを定義する事ができます。
オリジナルのattributeの事をカスタム属性といいます。
前提準備
今回はボタンの背景色を変更できるカスタム属性を作成しましょう
まずはカスタム属性を定義していきましょう
res/values/attrs.xmlに下記をコードを追加しましょう(XMLファイルがなければ追加が必要です)
<?xml version="1.0" encoding="utf-8"?>
<resources>
    <declare-styleable name="CustomView">
        <attr name="buttonColor" format="color" />
    </declare-styleable>
</resources>
上記を実施することによりCustomViewにbuttonColorというカラーコードが入力できるカスタム属性が作成できました。
他にも色々なデータを受け取れるformatがあるので後述します。
カスタム属性を作成するだけでは何も起こらないので設定されたCustomViewクラスでカスタム属性を取得してボタンに背景色を設定しましょう
    public CustomView(@NonNull Context context, @Nullable AttributeSet attrs, int defStyleAttr) {
        super(context, attrs, defStyleAttr);
        // XMLとクラスを紐づける
        View.inflate(getContext(), R.layout.view_custom, this);
        // 各ボタンのインスタンスを取得
        mTopButton = findViewById(R.id.topButton);
        mCenterButton = findViewById(R.id.centerButton);
        mBottomButton = findViewById(R.id.bottomButton);

        // TypedArrayのインスタンスを取得
        TypedArray typedArray = context.getTheme().
                obtainStyledAttributes(attrs, R.styleable.CustomView, defStyleAttr, 0);
        // カラーコードを取得
        int colorInt = Color.WHITE;
        try {
            colorInt = typedArray.getColor(R.styleable.CustomView_buttonColor, Color.WHITE);
        } finally {
            typedArray.recycle();
        }
        // 各ボタンの背景色を変更
        mTopButton.setBackgroundColor(colorInt);
        mCenterButton.setBackgroundColor(colorInt);
        mBottomButton.setBackgroundColor(colorInt);
    }
init {
// XMLとクラスを紐づける
View.inflate(getContext(), R.layout.view_custom, this)
// 各ボタンのインスタンスを取得
topButton = findViewById(R.id.topButton)
centerButton = findViewById(R.id.centerButton)
bottomButton = findViewById(R.id.bottomButton)
// TypedArrayのインスタンスを取得
val typedArray = context.theme
.obtainStyledAttributes(attrs, R.styleable.CustomView, defStyleAttr, 0)
// カラーコードを取得
var colorInt: Int = Color.WHITE
colorInt = try {
typedArray.getColor(R.styleable.CustomView_buttonColor, Color.WHITE)
} finally {
typedArray.recycle()
}
// 各ボタンの背景色を変更
// 各ボタンの背景色を変更
topButton.setBackgroundColor(colorInt)
centerButton.setBackgroundColor(colorInt)
bottomButton.setBackgroundColor(colorInt)
}こちらで準備完了です。注意点等は後述します。
カスタム属性を使用する
それではカスタム属性を使用してきちんと動作しているか確認しましょう
<?xml version="1.0" encoding="utf-8"?>
<androidx.constraintlayout.widget.ConstraintLayout
    xmlns:android="http://schemas.android.com/apk/res/android"
    xmlns:app="http://schemas.android.com/apk/res-auto"
    android:layout_width="match_parent"
    android:layout_height="match_parent">

    <com.example.androidstudyjava.CustomView
        android:id="@+id/customView"
        android:layout_width="wrap_content"
        android:layout_height="wrap_content"
        app:buttonColor="#FF0000"
        app:layout_constraintTop_toTopOf="parent"
        app:layout_constraintBottom_toBottomOf="parent"
        app:layout_constraintStart_toStartOf="parent"
        app:layout_constraintEnd_toEndOf="parent" />

</androidx.constraintlayout.widget.ConstraintLayout>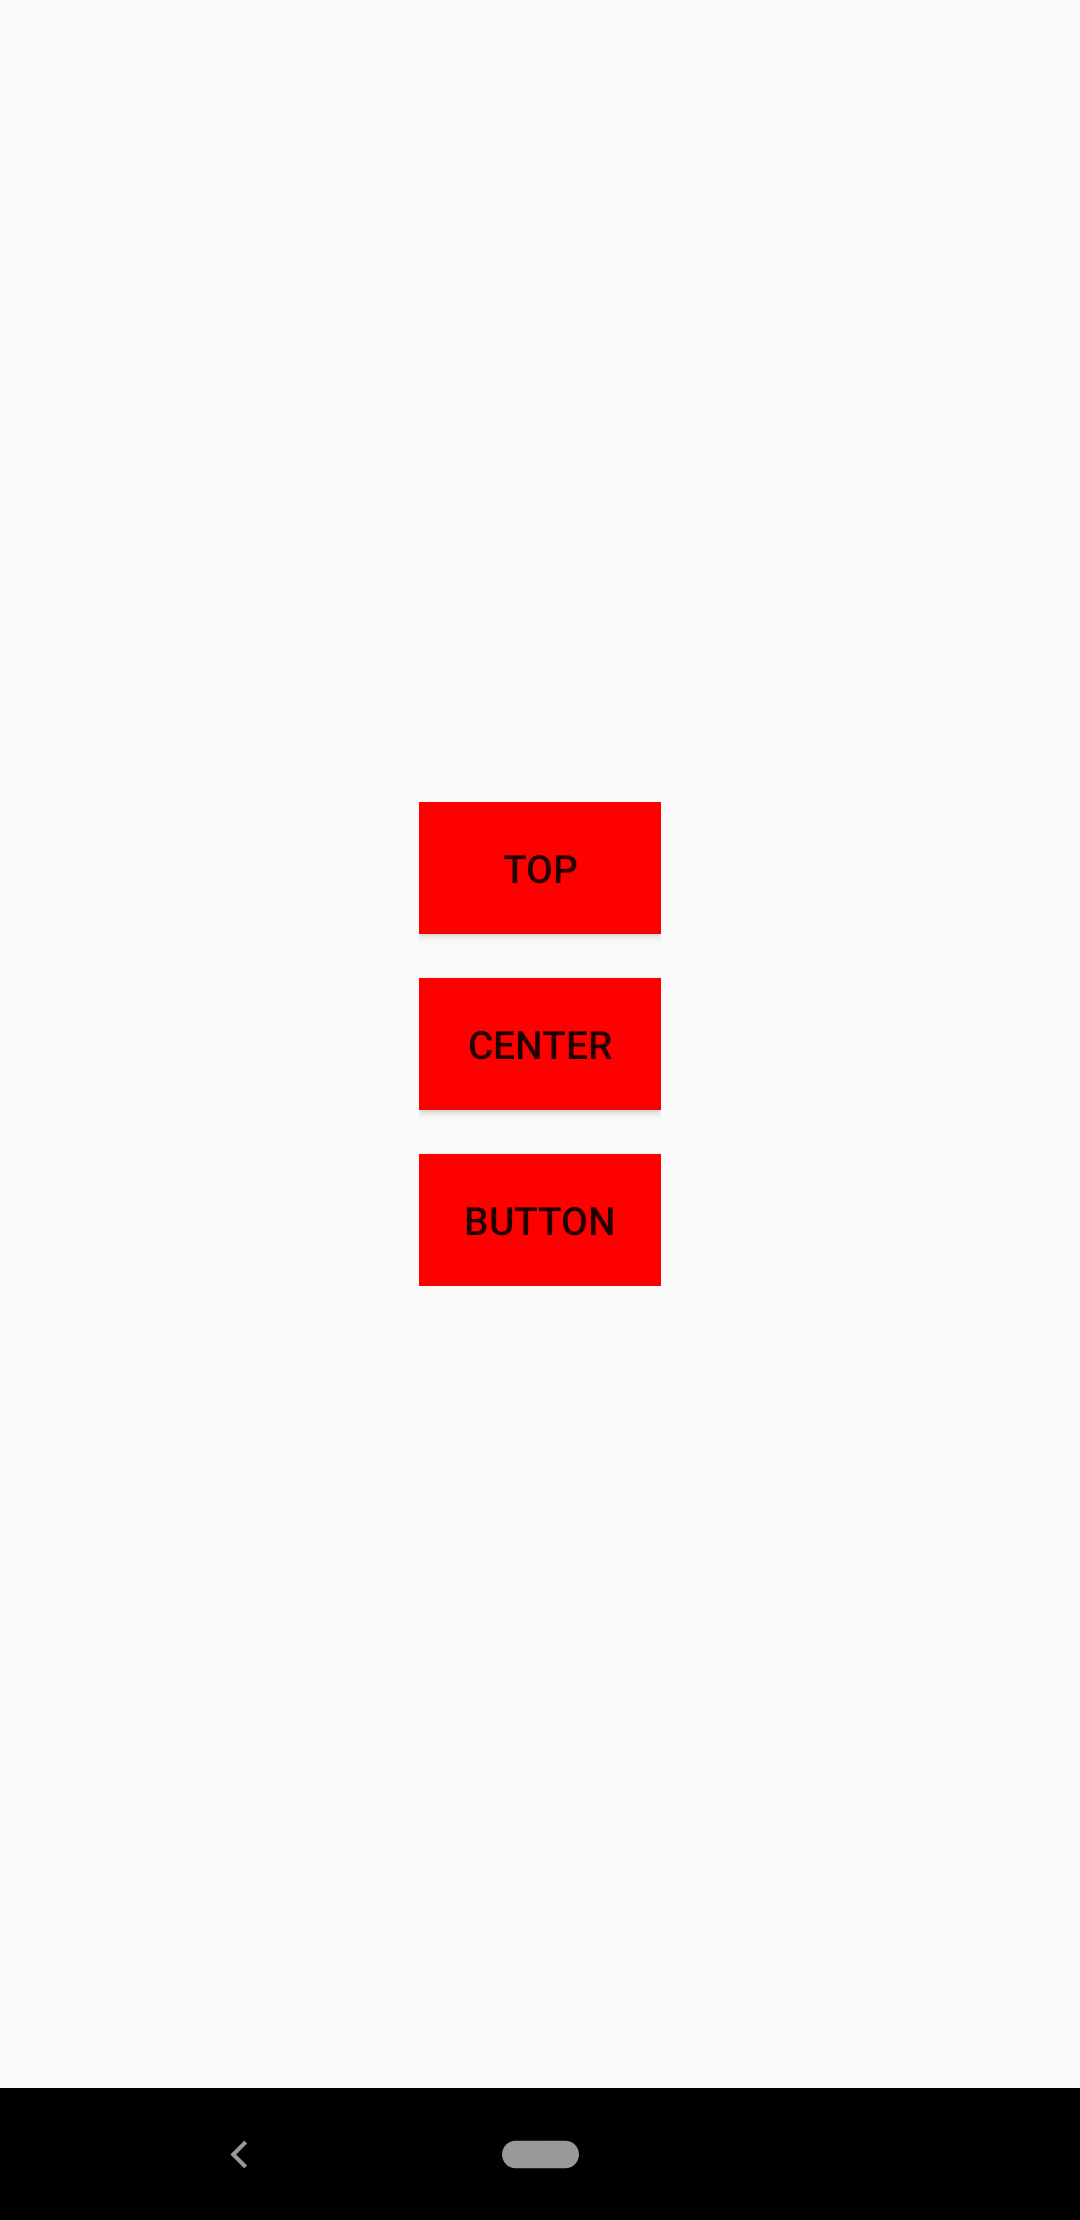
きちんと動作していますね!
ポイント
1. attrs.xmlにカスタム属性を追加する
attrs.xmlにカスタム属性を追加しないと下記現象が発生します。
- レイアウトXMLでビルドエラーになる
- クラスファイルからカスタム属性のデータが取得するためのidが生成されない
要注意です。
2. TypedArrayからgetXXXを実行する際はtry分で囲む
クラスファイルでカスタム属性のデータを取得する場合はtry分で囲まないとgetXXXメソッド内でExceptionがthrowされる事があるのでクラッシュしてしまいます。
3. recycle()を実行する
TypedArrayに対してrecycle()を実行してください。(TypedArrayの再利用ができないため)
カスタム属性に入力できるデータは何?
下記が使用できます。
| format | 説明 | 例 |
| string | 文字列 | app:xxx=”テキスト” |
| float | 実数値 | app:xxx=”1.5″ |
| integer | 整数値 | app:xxx=”15″ |
| boolean | 論理値 | app:xxx=”false” |
| enum | 列挙値 | app:xxx=”hoge” <-hogeを予め定義しておく必要がある |
| dimension | 単位(spやdp) | app:xxx=”15dp” |
| color | カラーコード | app:xxx=”#FF0000″, app:xxx=”@color/hoge” |
| reference | リソースID | app:xxx=”@id/hoge” |
| fraction | パーセント(割合) | app:xxx=”15%” |
| flag | フラグ値 | app:xxx=”hoge” <-hogeを予め定義しておく必要がある |
最後に
いかがでしたでしょうか
カスタム属性を追加することによりレイアウトXMLとクラスファイルでのみで処理が完結します。
FragmentやActivityが膨らまなくて済むのでいいですね!
それでは!

コメント