
こんにちは!
今回はViewの形を変更してみようと思います。
だいたいのViewの形はデフォルトで四角なので角丸にしたい場合は対応が必要です。
Viewを角丸にする
前提準備
まずは角丸にするためのdrawableを作成します。
<?xml version="1.0" encoding="utf-8"?>
<selector xmlns:android="http://schemas.android.com/apk/res/android">
    <item>
        <shape>
            <!-- Viewの背景色を設定 -->
            <solid android:color="#FF0000" />
            <!-- Viewの角丸を設定 -->
            <corners android:radius="16dp" />
        </shape>
    </item>
</selector>
表示する
<?xml version="1.0" encoding="utf-8"?>
<androidx.constraintlayout.widget.ConstraintLayout
    xmlns:android="http://schemas.android.com/apk/res/android"
    xmlns:app="http://schemas.android.com/apk/res-auto"
    android:layout_width="match_parent"
    android:layout_height="match_parent">

    <Button
        android:id="@+id/button"
        android:layout_width="wrap_content"
        android:layout_height="wrap_content"
        android:background="@drawable/shape_view"
        android:text="かどまる"
        app:layout_constraintTop_toTopOf="parent"
        app:layout_constraintBottom_toBottomOf="parent"
        app:layout_constraintStart_toStartOf="parent"
        app:layout_constraintEnd_toEndOf="parent" />

</androidx.constraintlayout.widget.ConstraintLayout>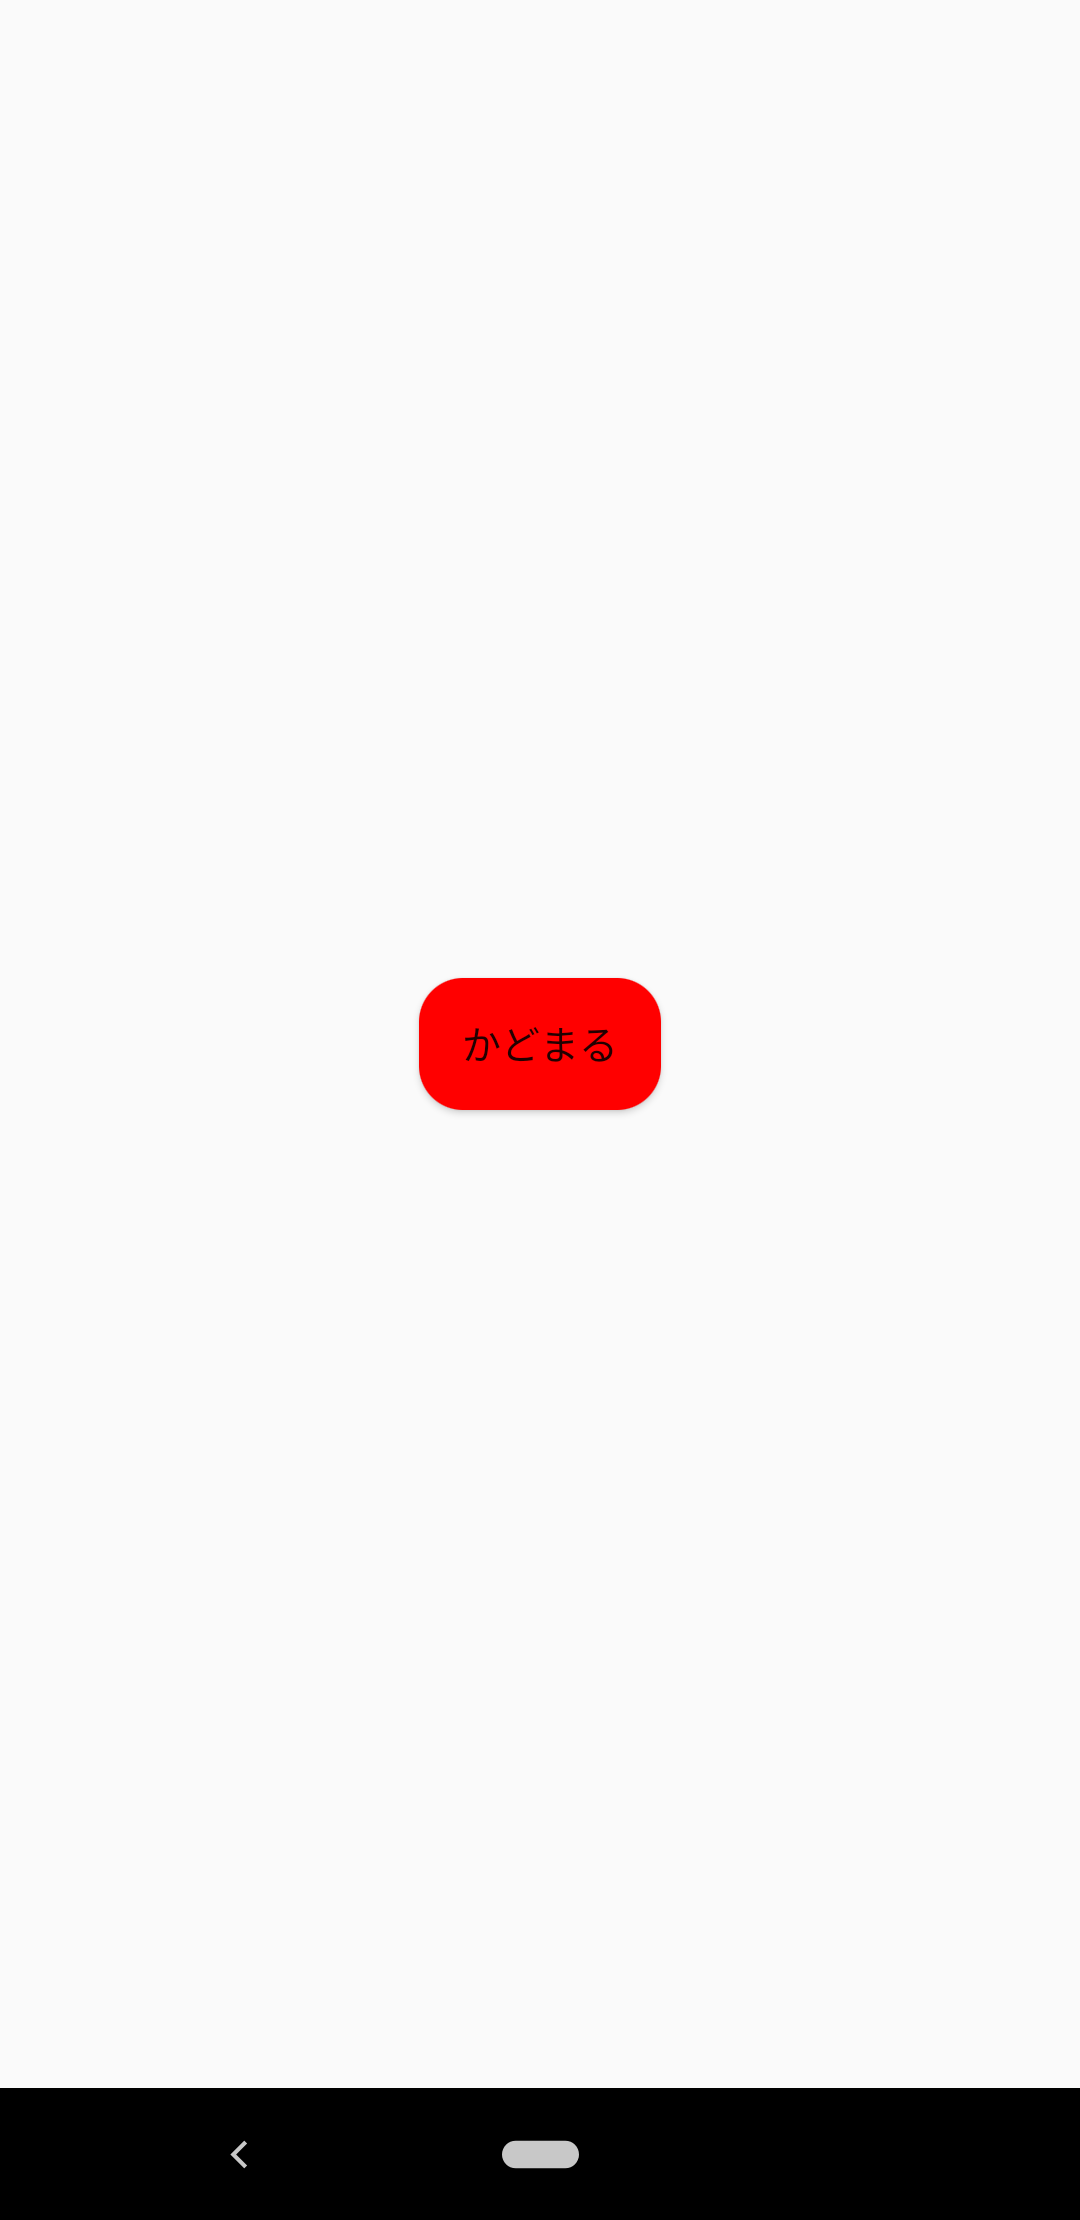
ポイント
1. cornersで角丸加減を設定する
cornersタグには下記の角丸を調節できるattributeが定義できます。
| attribute名 | 説明 |
| radius | 全ての角を指定したdp分丸みを強くする |
| topLeftRadius | 左上の角を指定したdp分丸みを強くする |
| topRightRadius | 右上の角を指定したdp分丸みを強くする |
| bottomLeftRadius | 左下の角を指定したdp分丸みを強くする |
| bottomRightRadius | 右下の角を指定したdp分丸みを強くする |
2.solidで背景色に色を定義する
角丸に設定したい場合はbackgroundにdrawableを設定する必要があります。
なのでdrawableには背景色を定義しないとViewの背景色がデフォルト表示になってします。
要注意です。
Viewを円形に設定する
続いてはViewを円形い表示してみましょう。
円形Viewと言えばTwitterの投稿ボタン等が円形ですね。
前提準備
角丸同様に円形用のdrawableを作成します。
<?xml version="1.0" encoding="utf-8"?>
<selector xmlns:android="http://schemas.android.com/apk/res/android">
    <item>
        <shape android:shape="oval">
            <!-- Viewの背景色を設定 -->
            <solid android:color="#FF0000" />
            <!-- Viewのサイズを設定 -->
            <size android:width="120dp" android:height="120dp" />
        </shape>
    </item>
</selector>
表示する
<?xml version="1.0" encoding="utf-8"?>
<androidx.constraintlayout.widget.ConstraintLayout
    xmlns:android="http://schemas.android.com/apk/res/android"
    xmlns:app="http://schemas.android.com/apk/res-auto"
    android:layout_width="match_parent"
    android:layout_height="match_parent">

    <Button
        android:id="@+id/button"
        android:layout_width="wrap_content"
        android:layout_height="wrap_content"
        android:background="@drawable/ring_view"
        android:text="円"
        app:layout_constraintTop_toTopOf="parent"
        app:layout_constraintBottom_toBottomOf="parent"
        app:layout_constraintStart_toStartOf="parent"
        app:layout_constraintEnd_toEndOf="parent" />

</androidx.constraintlayout.widget.ConstraintLayout>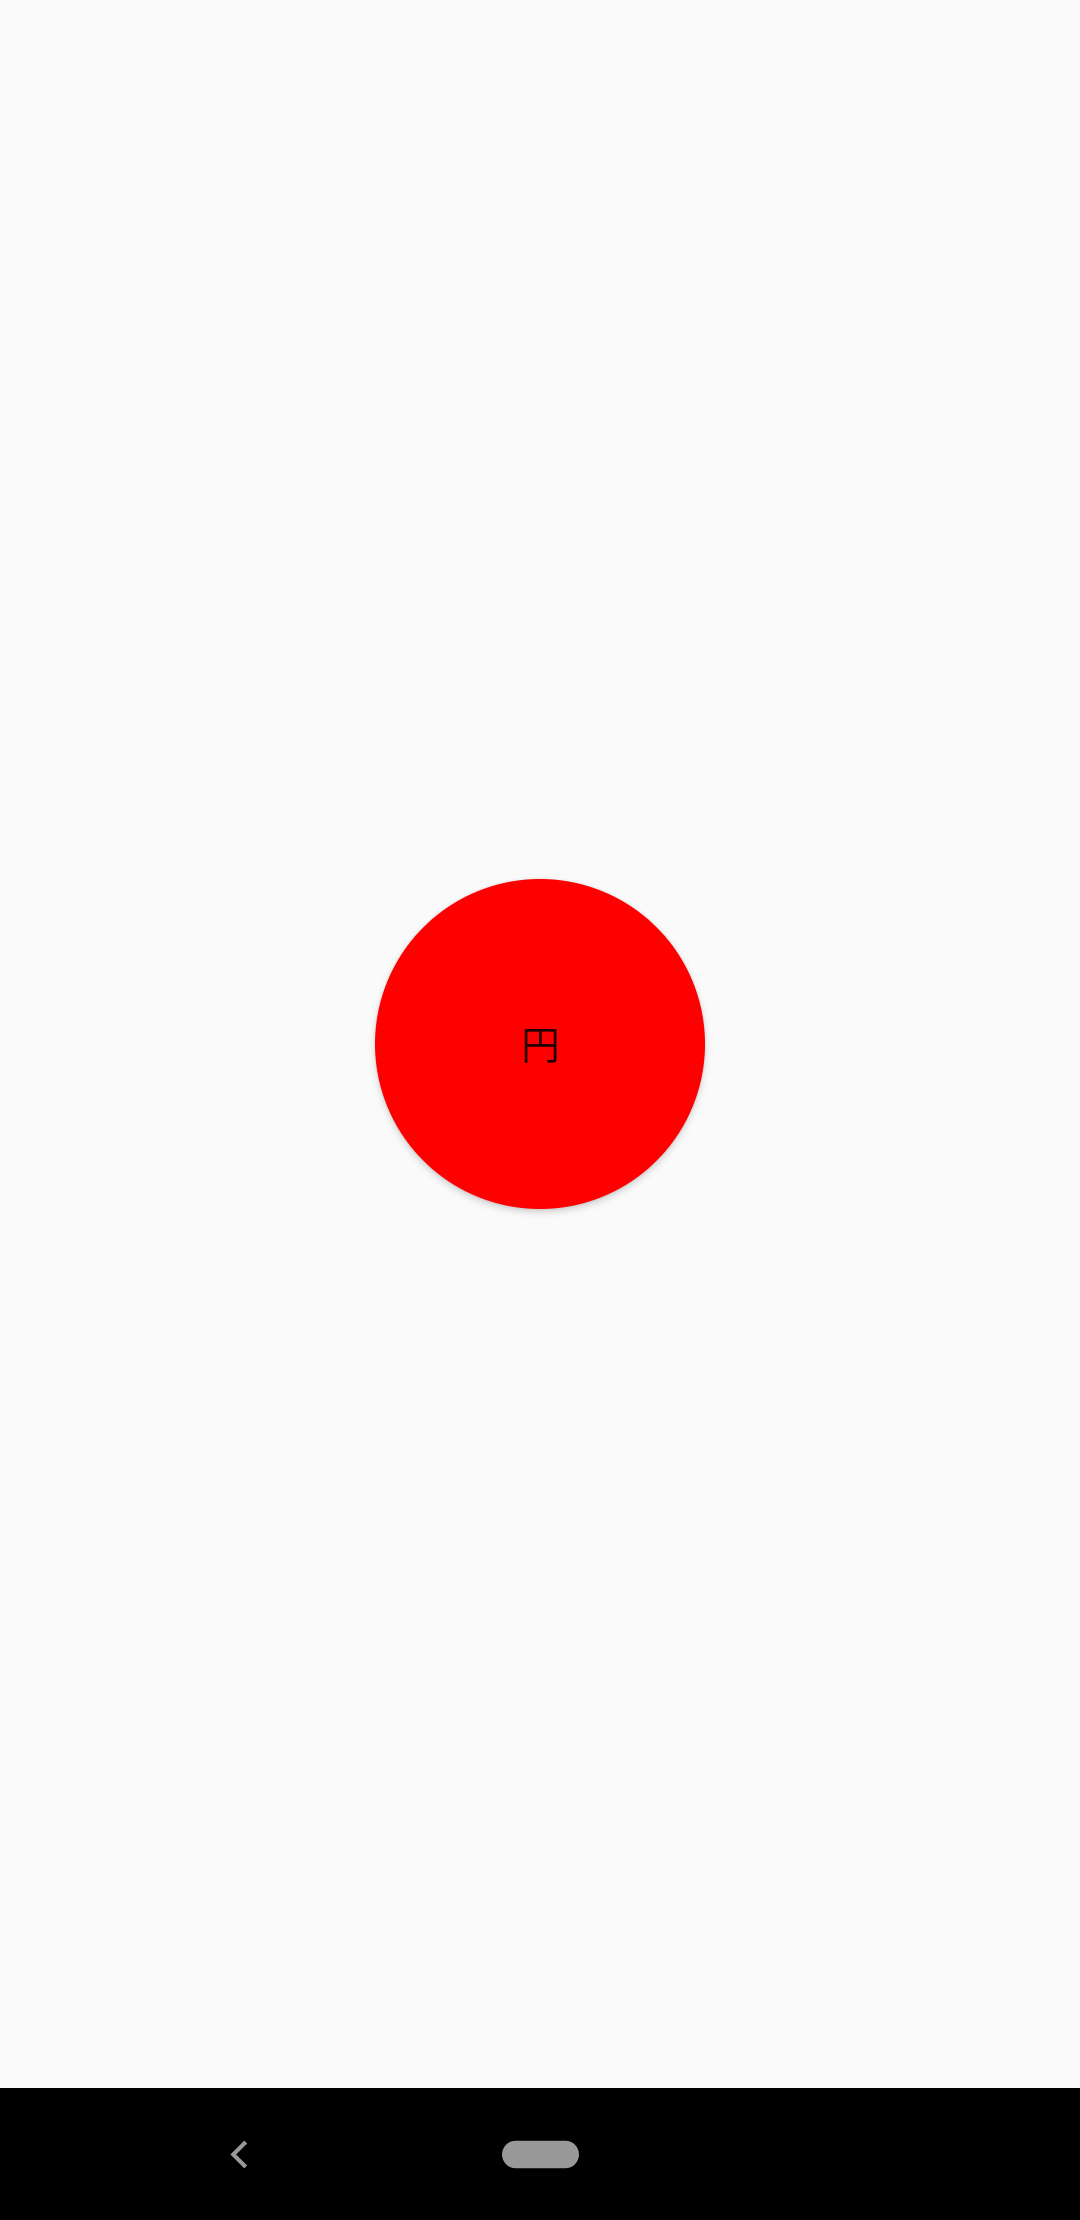
ポイント
1.sizeで円形を保つためにViewの縦横を同じ大きさにする
円形を保つためにwidth,heigtを同じ大きさにします。
違う大きさの場合楕円形になってしまうので注意です。
2.solidで背景色に色を定義する
こちらも角丸同様に背景色を設定しないとデフォルト色になってしまうので要注意です。
最後に
いかがでしたでしょうか
drawableを使ったViewの形の変更角丸、円形、楕円形、線くらいです。
ひしがたや好きな形を表示したい場合はCanvasを使用すると対応できます。
コメント